Author name: Emily de Leon

How to Paint a Flower for Beginners: 6 Easy Steps

Have you ever wanted to paint a beautiful flower but didn’t know where to start? Painting can be a lot of fun and a great way to relax. Today, I’m going to show you how to paint a flower step by step. This guide is perfect for beginners or anyone who loves art and wants to create something beautiful. So, let’s get started!

Learn how to paint a flower in a few easy steps!

How to paint a flower step 1: Gather Your Supplies

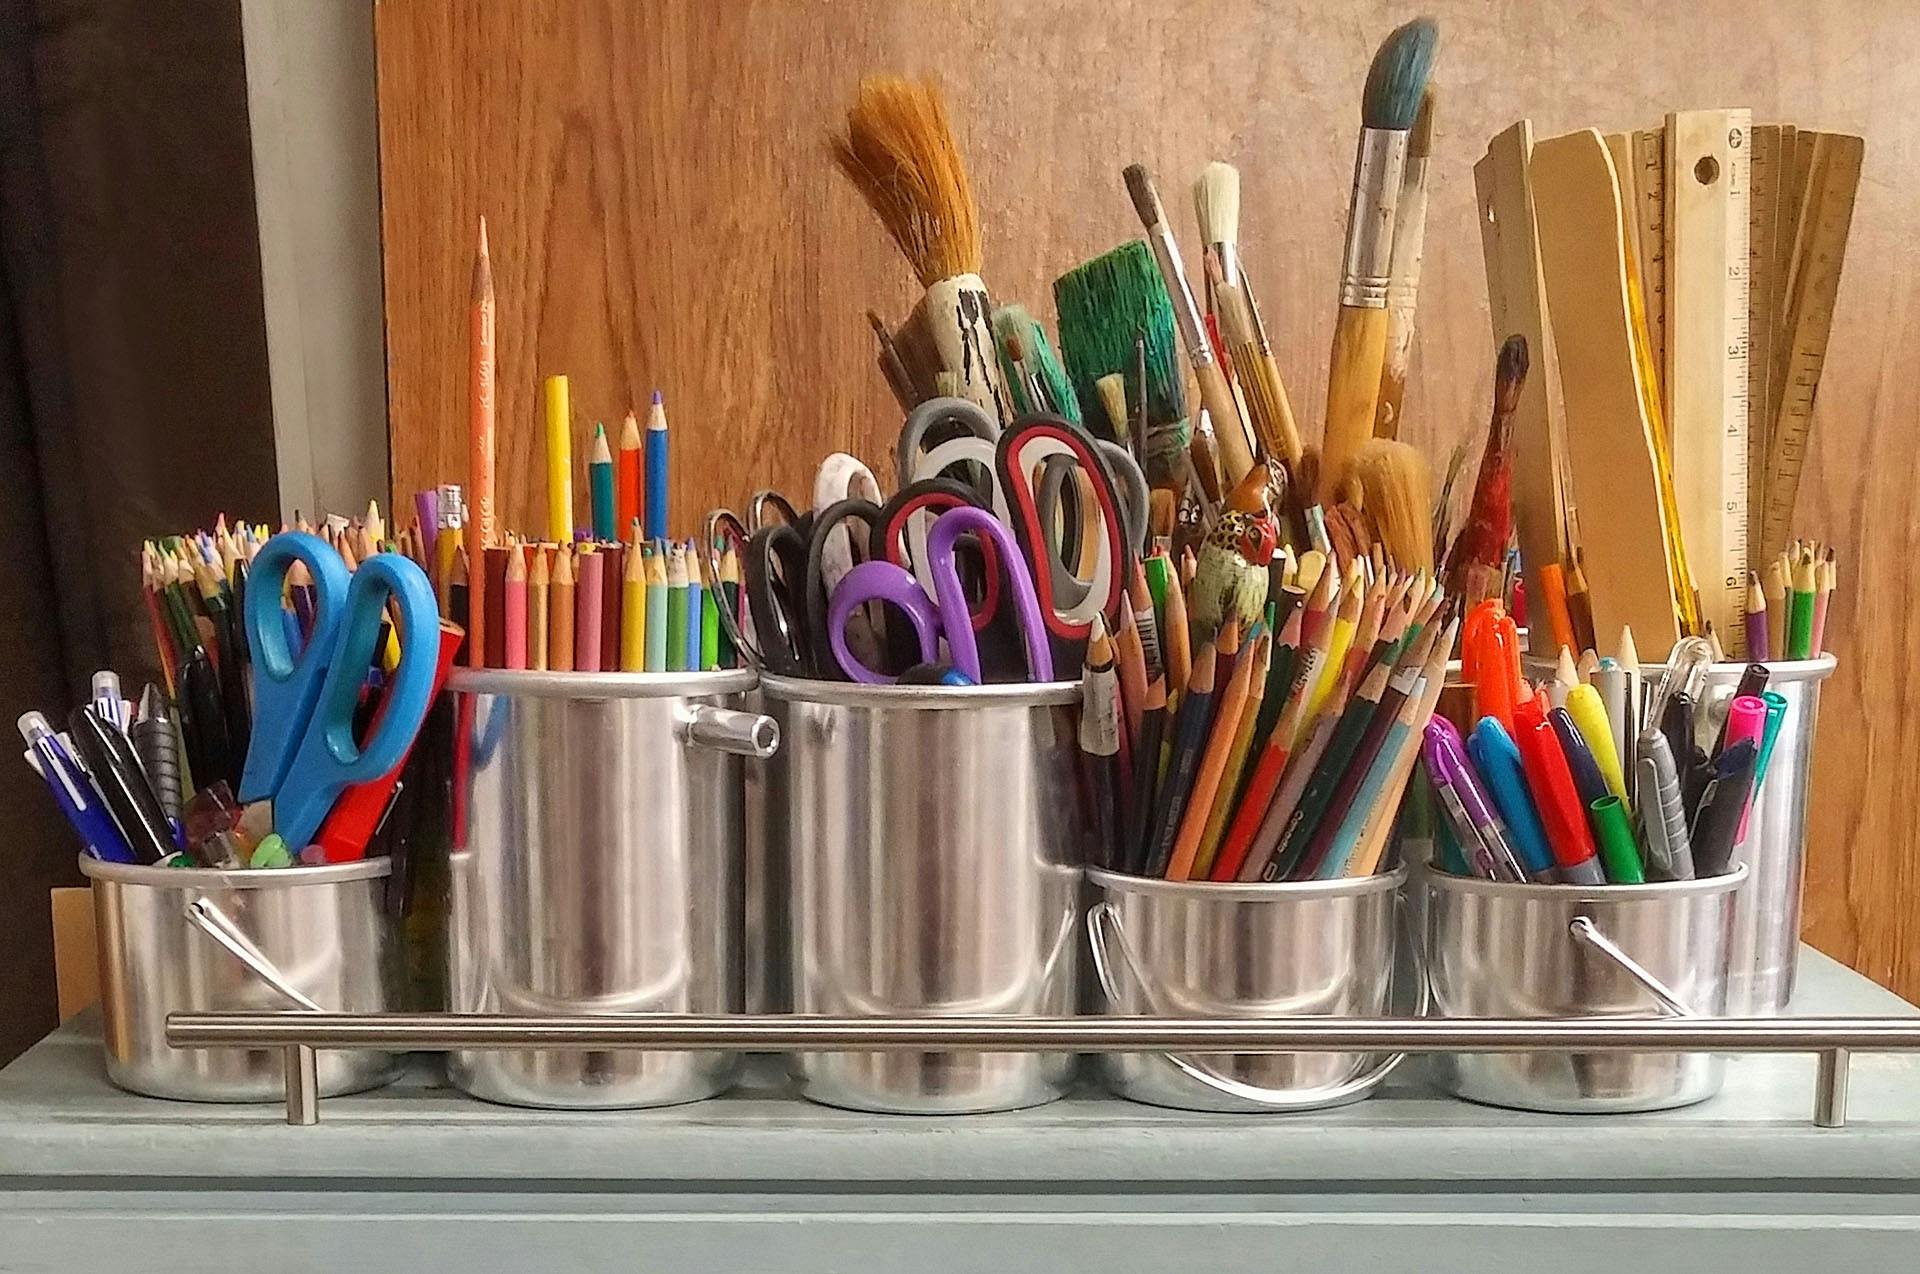
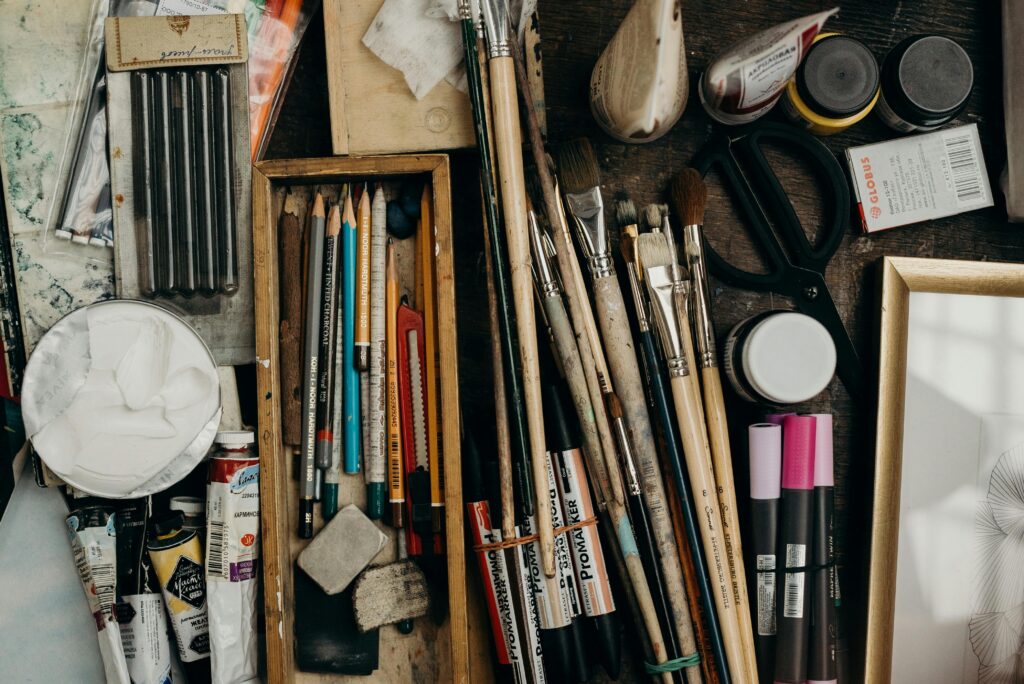
Before we dive into painting, it’s important to gather all the necessary supplies. You can find these supplies at your local craft stores, or purchase them from Amazon. If you choose to buy from Amazon, please use the links below to support Artsy Drawings!

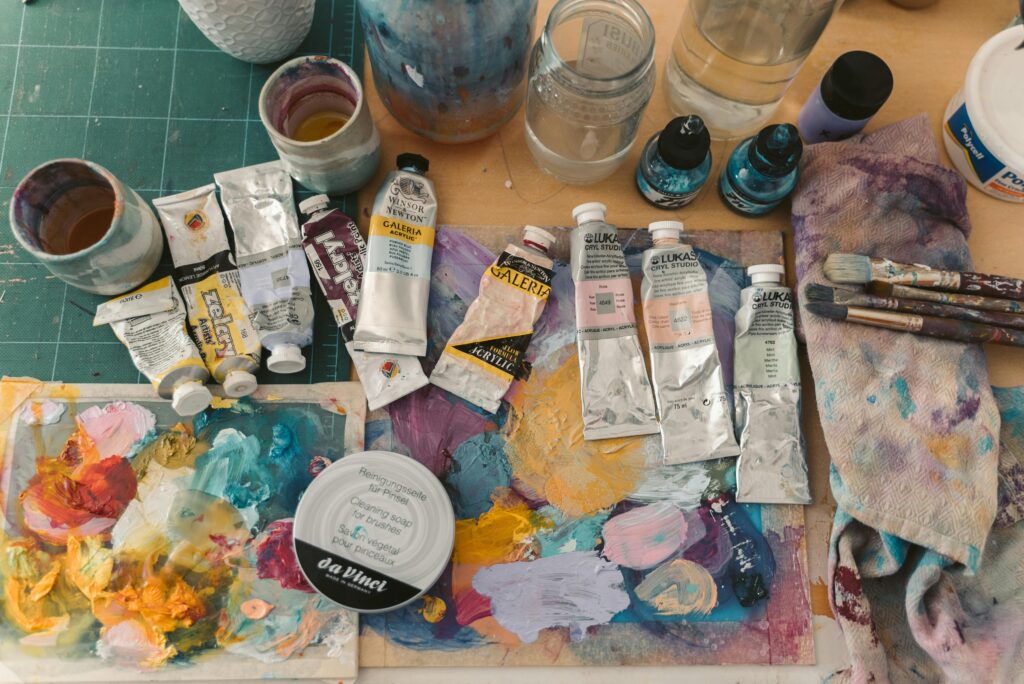
You will need paints, either acrylic or watercolor, depending on what you prefer. Acrylic paints are thicker and dry quickly, while watercolors are lighter and can be blended with water. For help choosing mediums, check out the article My Favorite Artistic Mediums. Choose colors that you love for your flower and background.

Next, you’ll need a variety of paintbrushes. Having a big brush for the background and smaller brushes for details will help you create different effects. You will also need a canvas or watercolor paper to paint on, and a palette to mix your paints. Regardless of whether you choose acrylic paints or watercolor paints, it’s important to keep a cup of water handy. If you’re using acrylics, a palette knife can be useful for mixing. Don’t forget to have some paper towels or a cloth to clean your brushes, and a pencil and eraser for sketching your flower.

Optional items that can make your painting experience better include an easel to hold your canvas or paper, an apron or old clothing to protect your clothes, and painters’ tape to keep your paper from moving. Once you have all your supplies ready, you’re set to learn how to paint a flower and create your masterpiece.

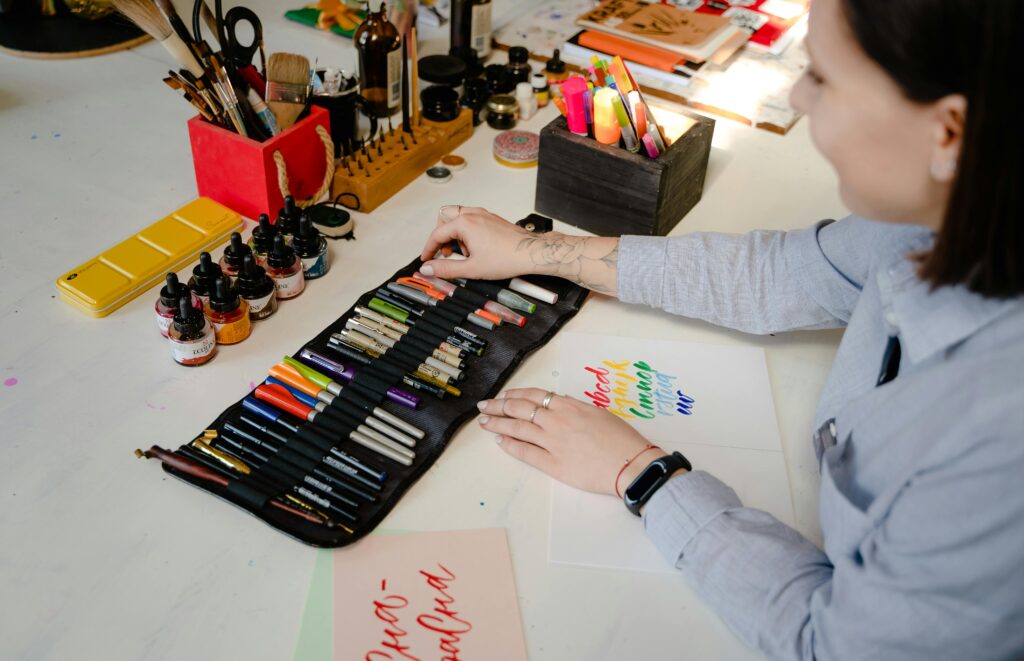
How to paint a flower step 2: Setting Up Your Workspace

how to paint a flower painting - artist set up
High Angle Shot of a Woman Painting by Leeloo The First

Creating a comfortable and organized workspace is crucial for a smooth painting experience. Find a well-lit area where you feel relaxed and can see your work clearly. Arrange your paints, brushes, and other materials within easy reach so you won’t have to interrupt your creative flow to hunt for supplies. Make sure your canvas or paper is secured on your easel or flat surface, and you’re ready to begin to learn how to paint a flower.

Having a reference photo can be very helpful. Choose a simple flower like a daisy, tulip, or sunflower. You can find pictures online or in books. Pinterest is a great source for reference material. A reference photo will guide you and help you understand the shapes and colors better.

Here are some helpful tips before you start: keep your workspace tidy to avoid distractions, use a color wheel for better color choices, and practice basic shapes before starting on the final sketch. These tips will make your painting experience more enjoyable and successful.

How to paint a flower step 3: Sketching the Flower

Now that your workspace is set up and your supplies are ready, it’s time for the real step 1 in how to paint a flower: sketching the flower. Using a pencil, lightly sketch the outline of your flower on the canvas or paper. Use simple shapes to get the proportions right. For instance, a daisy has a round center with long, thin petals radiating out. Use your reference photo to guide your sketch. Don’t worry about making your sketch perfect; it’s just a guide to help you when you start painting.

How to paint a flower step 4: Painting the Flower

how to paint a flower for beginners: different types of flowers in watercolor paint - Artsy Drawings
Learn how to paint a flower in a few easy steps!

Now comes the fun part—painting the flower! Start by applying a base layer to the petals using a light color. For example, if you’re painting a daisy, you might use white or light yellow. Use a smaller brush for this step and carefully paint each petal.

Once the base layer is dry, it’s time to add details. Remember, if you are using acrylic or gouache paint you can paint dark to light. If you are using watercolors, paint light to dark.

Use different shades and tints to create shadows and highlights. This will give your flower depth and make it look more realistic. For the center of the flower, use a different color like yellow or brown for a daisy, and paint the stem and leaves green. Blending the colors smoothly where they meet will help your flower look soft and natural. Add any final touches to enhance the details and make your flower pop.

Let your painting dry completely before moving on to painting the background. This will prevent the colors from mixing unintentionally.

How to paint a flower step 5: Painting the Background

With your flower fully based out, the next step is to paint the background. Pick a color that will make your flower stand out, such as a light blue or green, because these colors are opposite to red and orange on the color wheel. Using a big brush, apply the paint in long, even strokes to cover the entire background. If you want, you can blend different colors to create a more interesting effect. For example, you can blend blue and white to create a sky-like background. You can also add extra green colors for grass, trees, or whatever garden you may find your flower in.

Understanding Different Types of Flowers

While the daisy, tulip, and sunflower are excellent choices for beginners, it’s worth exploring a variety of flowers to expand your painting repertoire. Each flower has unique shapes, colors, and textures that can be both a challenge and a delight to paint. Let’s take a closer look at a few more flowers you might want to try.

how to paint a flower for beginners: different types of flowers in watercolor paint - Artsy Drawings
There are many different types of flowers you can choose to paint, from sunflowers and violets to hydrangeas and poppies.

Roses

Roses are classic and loved by many. They can be a bit challenging due to their layered petals, but with patience and practice, you can master them. Start by painting the central petals tightly together and gradually expand outwards, layering as you go. Use shades of red, pink, white, or yellow, and remember to add shadows and highlights to give depth.

Orchids

Orchids have an exotic and delicate appearance, making them a fascinating subject. Their petals often have intricate patterns and vibrant colors. When painting orchids, focus on capturing the delicate texture of the petals and the unique shapes of the flower parts. Use reference photos to help guide you.

Lilies

Lilies are elegant and can add a touch of sophistication to your artwork. Their large, curved petals and prominent stamens make them an interesting challenge. Use smooth, sweeping brushstrokes to capture the shape of the petals and pay attention to the subtle color variations in each petal.

Sunflowers

Sunflowers are cheerful and relatively straightforward to paint. Their bright yellow petals and large, dark centers make them instantly recognizable. When painting sunflowers, start with the center and work your way outwards, adding petals in layers to create a full, vibrant flower.

Cherry Blossoms

Cherry blossoms are delicate and often painted in clusters, creating a beautiful and serene scene. Use light pinks and whites, and focus on capturing the softness of the petals. Adding branches and buds can enhance the overall composition.

Hydrangeas

Hydrangeas are composed of many small flowers clustered together, creating a lush and full appearance. They can be painted in various colors, from blues and pinks to purples and whites. Use small, delicate brushstrokes to capture the individual flowers and create a sense of volume.

Practicing Different Flower Structures

As you become more comfortable with learning how to paint a flower, challenge yourself to explore different structures and compositions. Practice painting flowers from various angles and perspectives, such as a side view, top view, or even a close-up of a single petal. This will help you develop a better understanding of the shapes and forms of different flowers.

how to paint a flower for beginners: different types of flowers in watercolor paint - Artsy Drawings

Mastering Color Mixing and Techniques

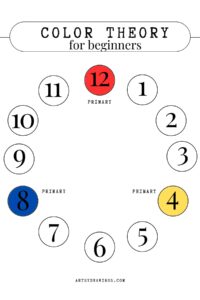
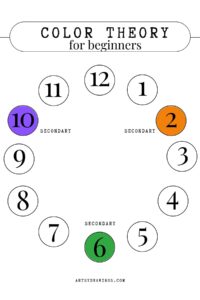
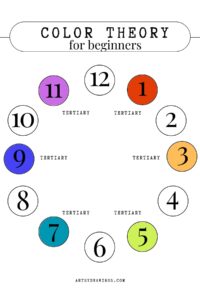
Color mixing is an important part of painting. Mixing colors allows you to create different shades and tones, making your painting more vibrant and realistic. For example, you can mix blue and yellow to make green, or red and white to make pink. Experiment with mixing colors on your palette to see what new colors you can create. If you want to learn more about color theory and mixing, check out our blog post here.

There are some easy painting techniques that can make your flower look even better. The wet-on-wet painting technique is when you apply wet paint onto wet paper or another layer of wet paint. This creates soft edges and allows colors to blend easily. The dry brush technique involves using a dry brush with very little paint. This technique is great for creating texture. Lastly, the layering technique involves applying multiple layers of paint, letting each layer dry before applying the next. This technique adds depth and richness to your painting.

To learn more color and painting techniques, check out the articles about My Favorite Artistic Mediums, Color Knowledge Tips to Make You a Better Artist, and Color Theory for Beginners.

How to paint a flower step 6: Final Steps

After you’ve finished painting your flower, let it dry completely. This might take a few hours depending on the type of paint you used. Once it’s dry, you can handle your painting without worrying about smudging it. If you want to protect your painting, you can apply a clear varnish, though this step is optional. Sealing your painting can help it last longer and keep the colors vibrant.

At Artsy Drawings, we recommend using a good quality varnish, especially if you plan to sell your work or hang it in a sunny place. We use Liquitex Acrylic Medium Gloss Varnish for acrylic paintings.

Conclusion

You did it! You’ve painted a beautiful flower. In a few simple steps, you created a beautiful work of art, and became better at knowing how to paint a flower. Painting is all about practice and enjoying the process, so don’t worry if your first flower isn’t perfect. Keep practicing, and you’ll get better and better.

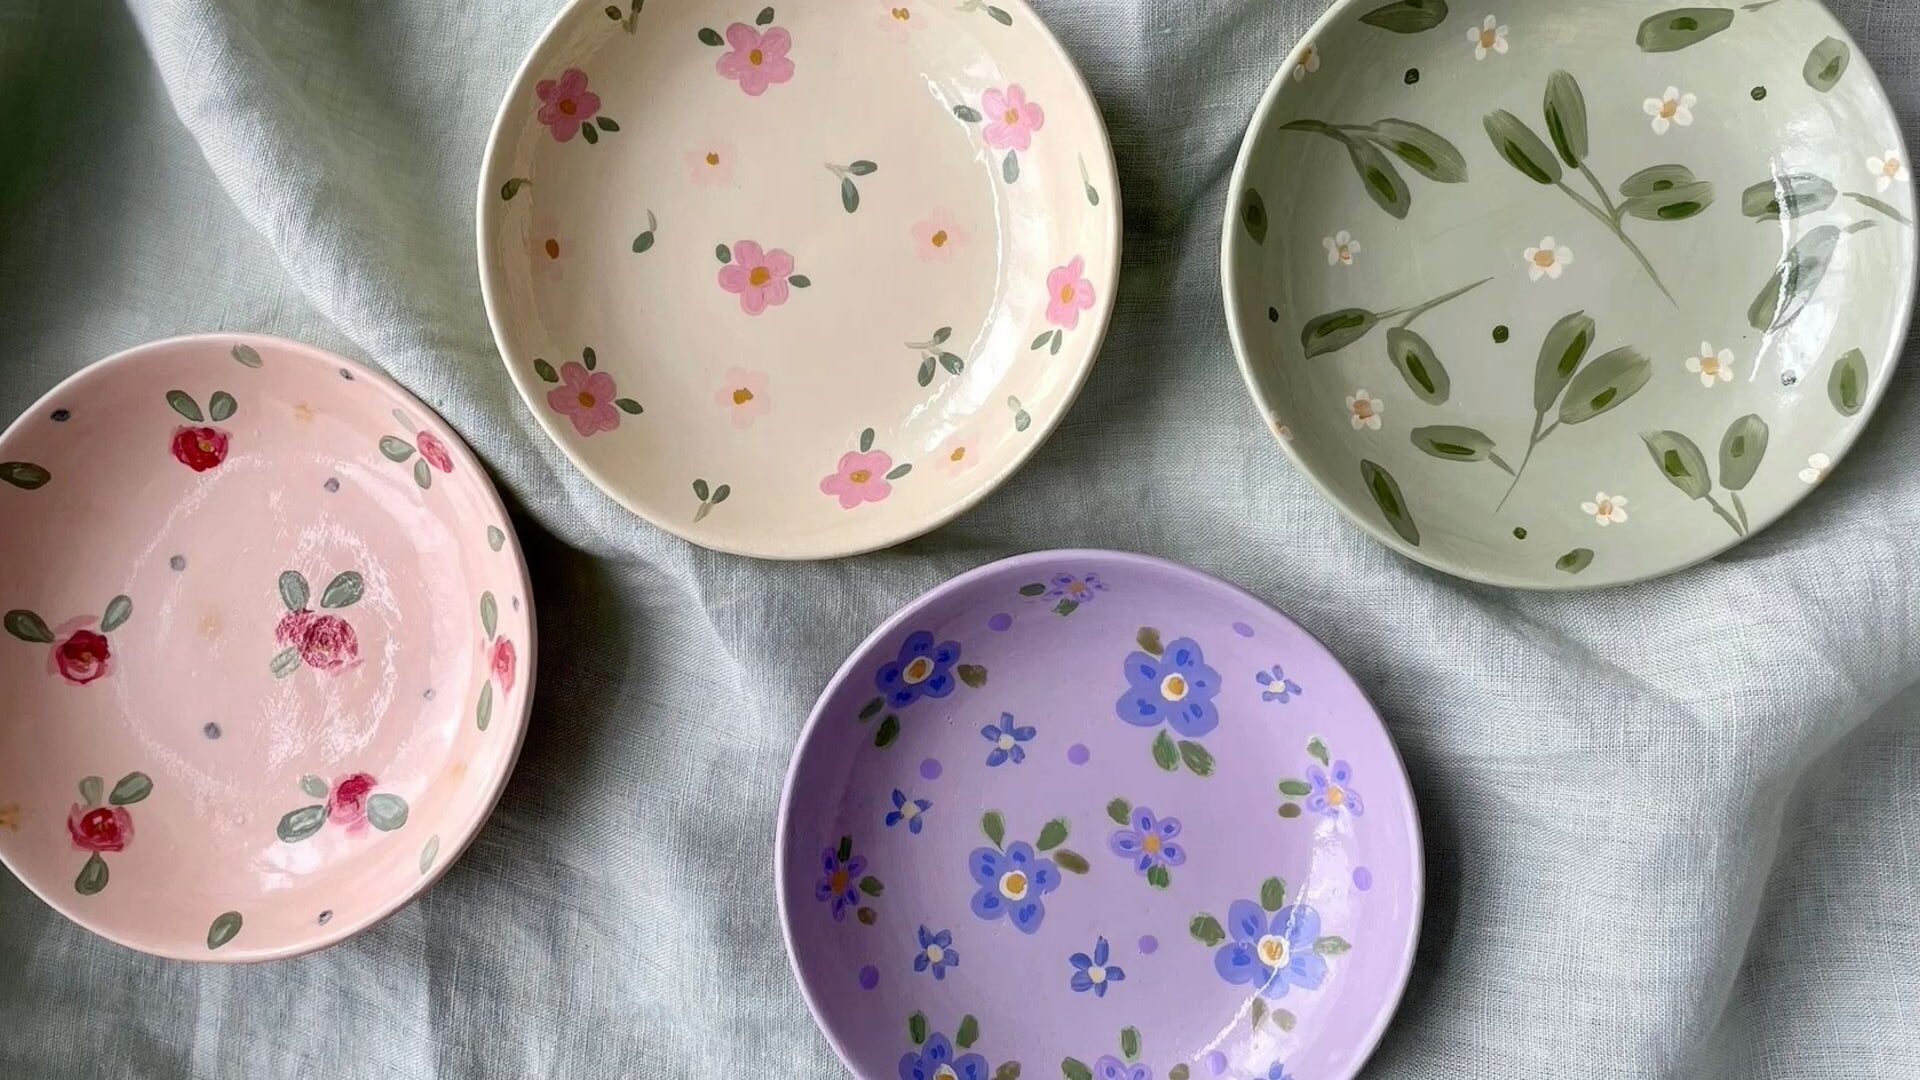
Knowing how to paint a flower can be a versatile skill that extends beyond your canvas. For instance, you can apply this talent to decorate pottery, adding a personal and artistic touch to ceramic pieces like vases or plates, making them unique gifts or home decor. Additionally, hand-painted flowers can be used to create personalized holiday ornaments or cards, infusing gifts with a special, handcrafted charm that reflects your creativity and attention to detail. This skill can also enhance your ability to design floral patterns for textiles or even decorate cakes with artistic precision.

We’d love to see your flower paintings! Share your finished artwork on social media and tag us. Feel free to leave comments and let us know how your painting experience went.

how to paint a flower for beginners: paint flowers on pottery
You can use this skill of how to paint flowers on all sorts of things: from canvas to pottery

How to Paint a Flower for Beginners: 6 Easy Steps Read More »

Easy Color Theory for Beginners

Color theory is all about how colors work together and the rules that tell us how to use them in art, design, and in our daily lives. It’s really important for those who are just starting out in art and design because it helps you make things that look nice and balanced.

One important person in the story of color theory is Sir Isaac Newton. He found out that white light is actually made up of all different colors – red, orange, yellow, green, blue, indigo, and violet. This discovery helped us create the color wheel, which is a tool that shows us how colors relate to each other and how we can mix them to get different effects. In this blog post, you’ll learn how color makes a big difference in art, design, and even in your daily life.

What is Color Theory?

Understanding color theory is really important when you’re creating art or designs. If you’re just starting out, it might seem a bit hard, but don’t worry! Once you get the hang of some basic ideas, you’ll be able to use color theory in your own work with no problem.

Let’s start with primary, secondary, and tertiary colors. These are the main parts of color theory.

Primary colors are red, blue, and yellow. They’re the starting point for all other colors. Secondary colors are made when you mix two primary colors together. That’s how you get green, orange, and purple. Tertiary colors come from mixing a primary color with a secondary color. That gives you colors like red-orange, yellow-green, and blue-purple.

So, how can we see all these colors and how they relate to each other? That’s where the color wheel comes in. It’s a tool that arranges the primary, secondary, and tertiary colors in a circle. By looking at the color wheel, you can learn about how colors work together.

color theory for beginners shows primary secondary and tertiary colors like numbers on a clock
If the Color Wheel was a clock, primary, secondary, and tertiary colors would sit at numbers from 1-12.

For example, complementary colors are colors that are right across from each other on the color wheel. When you use them together, they make each other stand out and your artwork look really vibrant. Color harmonies are combinations of colors that just look good together. They can be analogous colors, which are next to each other on the color wheel, or triadic colors, which are evenly spaced around the color wheel.

Guidelines in Color Theory:

Understanding these guidelines in color theory can help you make informed decisions when creating art and design. By using the color wheel as a guide, you can create cohesive color schemes that enhance the overall look and feel of your work. Whether you are painting a piece of art, designing a website, or choosing an outfit, incorporating color theory can take your creations to the next level.

The color wheel is like a rainbow in a circle. It has primary colors (red, yellow, and blue), secondary colors (orange, green, and purple), and tertiary colors (mixtures of primary and secondary colors). Understanding these colors can help beginners create nice color combinations for their artwork.

Complementary colors are colors that are directly across from each other on the color wheel, like red and green or blue and orange. When you use them together, they create a strong contrast and make the artwork pop. On the other hand, color harmonies are groups of colors that look good together, like analogous colors (colors that are neighbors on the color wheel) or triadic colors (three colors that are spaced evenly around the color wheel).

Using Colors in Everyday Life:

Colors are really important in our daily lives because they can affect how we feel. For example, red can make us feel excited and passionate, while blue can make us feel calm and peaceful. Understanding how colors can affect our feelings can help us when we’re creating art or designs.

Artists like to use colors to make people feel different things. Two famous artists who did this are Piet Mondrian and Wassily Kandinsky. Mondrian liked to use big blocks of colors like red, blue, and yellow in his paintings. Kandinsky liked to use bright and bold colors to make people feel different emotions.

Piet Mondrian and Wassily Kandinsky were both really good at using color. They understood how colors can make people feel certain ways. Mondrian liked to use big, bright colors like red, blue, and yellow in his artwork. He made simple shapes and filled them in with these bold colors. One of his most famous works is called “Composition with Red Blue and Yellow”. In this painting, you can really see how he used these primary colors to make a strong statement.

On the other hand, Kandinsky liked to use lots of different colors in his art. His painting “Composition VIII” is full of many different colors. He used these colors to explore how they can make people feel. Both Mondrian and Kandinsky show us how color can be really powerful in art. They teach us that we can use color in smart ways to make people feel strong emotions.

Colors are also really important when we’re designing a website or a graphic. Warm colors like red and orange can make people feel excited and energetic. Cool colors like blue and green can make people feel calm and peaceful. By understanding how colors work, designers can use them to make people feel a certain way.

Businesses also use colors to make people feel a certain way. They do this to help people remember their brand. A good example is McDonald’s. They use the colors red and yellow to make people feel warm, energetic, and happy. These are feelings that we usually associate with eating fast food.

Understanding colors can also help you when you’re picking out clothes or creating a brand. By picking colors that match your personality and values, you can create a brand that people will recognize. When you’re picking out clothes, understanding colors can help you pick outfits that look good and express your personal style.

In Conclusion

Color theory is not just a tool for artists, but a fundamental aspect of everyday life. Understanding the basics of color theory can enhance your creativity, communication, and emotional expression through art, design, and branding. By exploring the impact of color on mood and emotions, as well as its practical applications in various industries, you can develop a deeper appreciation for the power of color in our lives.

So, whether you are a beginner in art or a seasoned professional, continue to explore and learn about color theory as a guide to creating impactful and meaningful work. Embrace the beauty and versatility of color, and let it inspire you to create art that truly speaks to the soul.

Enjoy this article? Read more from Emily here, and check out more color theory tips in this article.

Easy Color Theory for Beginners Read More »

How to Thrift Art Supplies: 10 Easy Tips

Getting the right art supplies is very important for making art. Having good quality materials can really make your art look better. But, buying new art supplies can be costly. That’s why many artists like to thrift art supplies second-hand. This process can benefit the environment, save money, and utilize fewer new materials in this way. We’ll discuss how and where to thrift art supplies, as well as the benefits, in this blog post.

art supplies thrift secondhand
Art supplies can get expensive, but don’t let that stop you from creating art.

Understand What Makes Good Art Supplies

When making art, the quality of your art supplies can really matter. So, what makes good art supplies? How can you differentiate between something that’s merely okay and something that’s really good? Let’s break it down.

First and foremost, good art supplies should be durable. This means that they are built to last and can withstand repeated use. For example, a good paintbrush should have a sturdy handle that is comfortable to hold and bristles that don’t easily fall out. Similarly, a good sketchbook should have thick, high-quality pages that won’t easily tear or get damaged by erasers or different types of mediums.

Good art supplies should have a high level of performance. This means that they do their job well. In the case of paint, it should have vibrant, consistent colors and should apply smoothly on the canvas. Likewise, a good pencil should make clear, precise lines and should be easy to erase without leaving smudges or marks. They can be used for a variety of different art projects and styles. This is especially important if you like to experiment with different techniques or if you’re still exploring your artistic style.

Successful artists experiment frequently to see what works and what doesn’t. Choose art supplies that work for you and your style.

However, it’s important to remember that good art supplies don’t always have to be the most expensive ones. Sometimes, you can find high-quality art supplies at thrift stores or second-hand shops. The key is knowing what to look for. When shopping for thrift art supplies, you should always carefully check the condition of the items. Make sure they are not damaged in any way and that they still function as expected.

The best art supplies are the ones that work well for you. Everyone has different preferences and different needs when it comes to their art materials. What one person prefers might not work for another person. So, don’t be afraid to try out different types of art supplies and brands until you find the ones that suit your unique style and needs.

Thrift art supplies may be well loved, but not in the best condition. Be sure to carefully evaluate the materials before purchasing.

Where to thrift Art Supplies

Thrift stores are excellent places to find thrift art supplies second-hand. They often have a wide variety of items, from paintbrushes and sketchbooks to easels and canvases. Here are a few places you might want to check out:

1. Goodwill

Goodwill stores sell all sorts of donated items, including thrift art supplies. You may find brushes, paints, sketchbooks, and much more, all at affordable prices. Their stock changes often, so frequent visits may lead to finding different supplies each time.

2. Salvation Army

The Salvation Army also offers a variety of thrift art supplies. Their prices are usually very reasonable, which is great for artists on a budget. Similar to Goodwill, their inventory changes frequently, so there’s always a chance of finding something new.

3. Local Charity Shops

Local charity shops can be hidden gems for second-hand art supplies. These smaller shops often have a more select range of items. When you buy from them, you’re supporting local charities, which is a wonderful added bonus.

4. eBay

eBay is an online marketplace where you can find almost any type of art supply. There’s a huge range of items, from barely-used to brand-new. However, make sure to read the descriptions carefully and check the seller’s ratings before buying anything.

5. Etsy

Etsy is not just for handmade and vintage items – it also has a section for craft supplies. You can find unique and high-quality used art supplies here, often from fellow artists. As with eBay, keep an eye on seller ratings and reviews to ensure a successful purchase.

6. Facebook Marketplace

Facebook Marketplace is a great platform to find used thrift art supplies in your local area. People in your community might be selling just the thing you need. Besides finding great deals, it’s also a good way to connect with other local artists.

Remember, whether you’re shopping in-store or online, always check the condition of the art supplies before buying. Happy thrifting!

avoid low quality thrift Art Supplies

When you’re looking for thrift art supplies at second-hand stores, it’s really important to take your time and look over everything carefully before you buy it. Here are some easy-to-follow tips on how to make sure you’re getting good stuff:

  1. Look over all the art supplies for any damage: Before you buy anything, make sure you check it over really well. Look for any damage like cracks, dents, rust, or any missing parts. You want to make sure that the supplies are in good shape so you can use them for your art projects.
  2. Try out the thrift art supplies to make sure they still work: Besides just looking them over, you should also try out the art supplies to make sure they work like they’re supposed to. For example, if you’re thinking about buying a paintbrush, check to see if the bristles are in good shape and can hold paint well. If you’re looking at paints, open the tubes to check the color and how smoothly it comes out. This way, you can avoid any surprises when you start using them for your art.
  3. Talk to the thrift store workers about prices: Don’t be shy about asking for a lower price when you’re buying second-hand art supplies. A lot of thrift stores are happy to negotiate prices, especially if something has been there for a while. Ask nicely if they can lower the price a bit, especially if you’re buying a lot of things. If you’re nice to the thrift store workers, you might even be able to get discounts or special deals on art supplies.

By following these steps, you can feel confident about buying second-hand art supplies at thrift stores. Keep in mind that buying used thrift art supplies at these stores is not only a great way to save money, but it also helps to reuse materials that might have been thrown away. So, it’s a win-win situation! You save money, you help the environment, and you might even discover some really cool art supplies that you wouldn’t find anywhere else.

Conclusion:

Thrifting for art supplies is a fantastic way to save money, reduce waste, and discover unique materials for your creative projects. By exploring local thrift stores, researching brands, and carefully evaluating each item, you can build a collection of quality art supplies without breaking the bank. Not only does thrifting benefit your wallet and the environment, but it also adds an element of excitement and surprise to your artistic practice.

Whether you’re an experienced artist looking to expand your materials or a beginner on a budget, consider giving thrift shopping a try for your next art project.

Enjoy this article? Read more from Emily here.

How to Thrift Art Supplies: 10 Easy Tips Read More »